I’ve got an amazing digital lesson for my students, but how do I get it to them? If this thought has been in your head – trust me you are not alone! Whether you are new to a school that uses technology for facilitating assignments or whether you have been thrust into distance learning due to an emergency, the underlying issue is the same. Teaching our students through technology can be difficult if you don’t know the basics. So that’s what I want to give you today – the basic ins and outs of how to assign digital lessons to your students.

So first off let me tell you that I am no technology expert. However, I think it is that exact fact that will help me explain these processes in a way that even the most technology-challenged person can understand.
There’s so much that goes into distance learning. We can’t possibly cover all of it in one blog post. Today we are going to focus on how to assign digital lessons to your students. There are a few options, each with their pros and cons.
How to Assign Digital Lessons with E-Mail
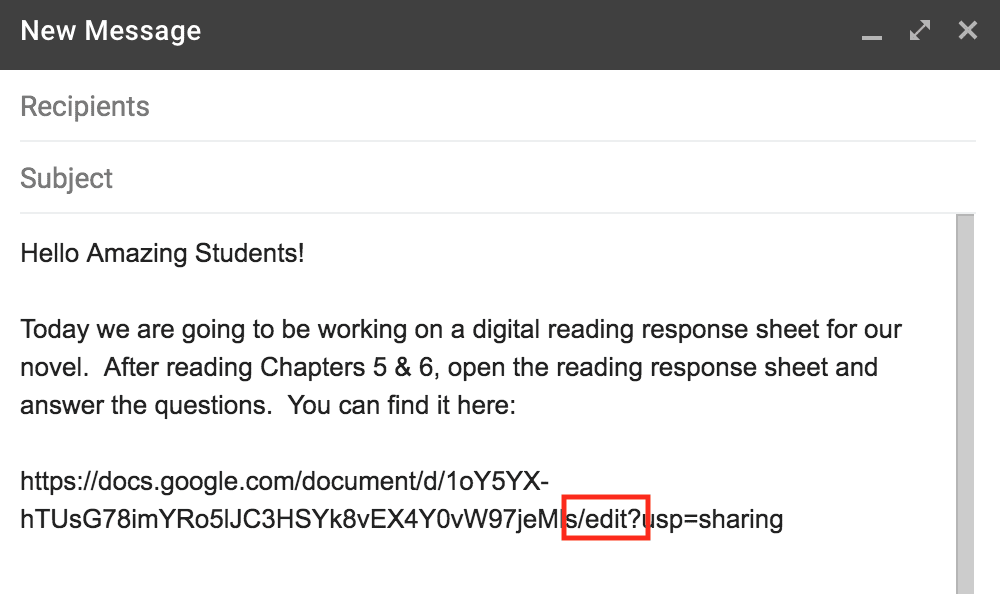
The first, and most basic way to send lessons to your students is via email. Using email you can send a lesson as an attachment or send a link in the body of the email.
One of the downfalls of email is that it could be quite laborious to go through all the return emails as your students complete assignments. To help minimize this I would suggest a couple of things:
- Send no more than one email a day (one a week would be even better)
- Include the date in the subject line (Today’s Lessons 3/26/20)
- Use bcc: so that you are not inadvertently sharing everyone’s email address to your entire class
In your email share as much information as you can so that your students can work independently or with the help of parents. Make the instructions easy for parents to follow or you will be answering lots of questions.
Share links to videos of you teaching, related videos, related web sites, or online assignments. Attach a .pdf of any assignments or instructions that students will need. These may need to be printed at home.
As easy as it is, email definitely has some limitations and may not be the best choice for distance learning.
How to Assign Digital Lessons Using Google Drive

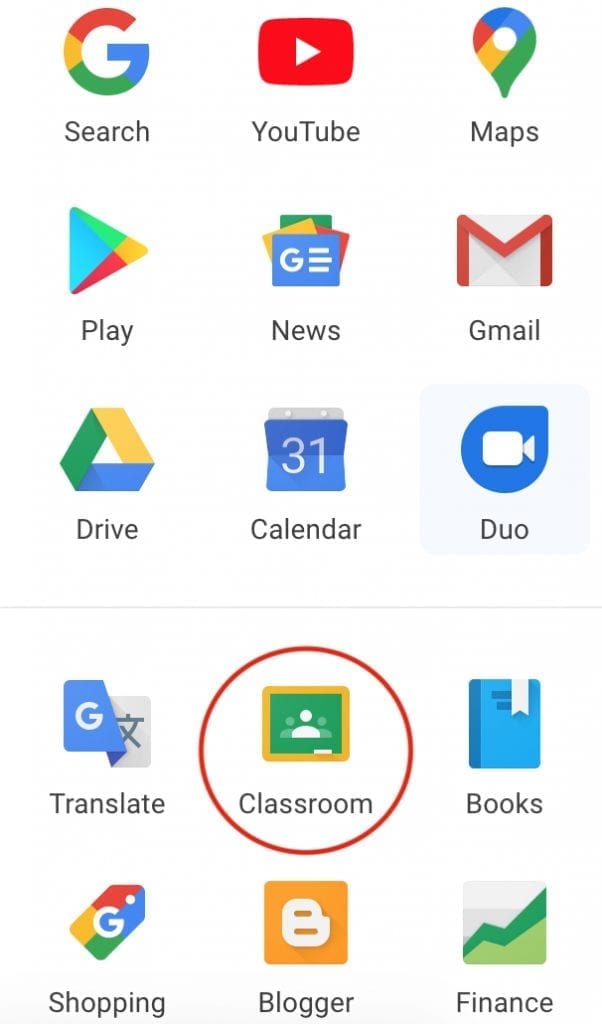
Did you know that if you have a gmail account you also have access to free online storage space provided by Google? This free storage space is called Google Drive and it can be a great place to store digital lessons. To find your Google Drive, log in to your gmail account and click on the square of 9 dots in the top right corner.
Once you click on it a drop down box with lots of different Google resources will appear. Scroll down until you see Drive. Your icons might be in a different order than mine – but they will look the same.
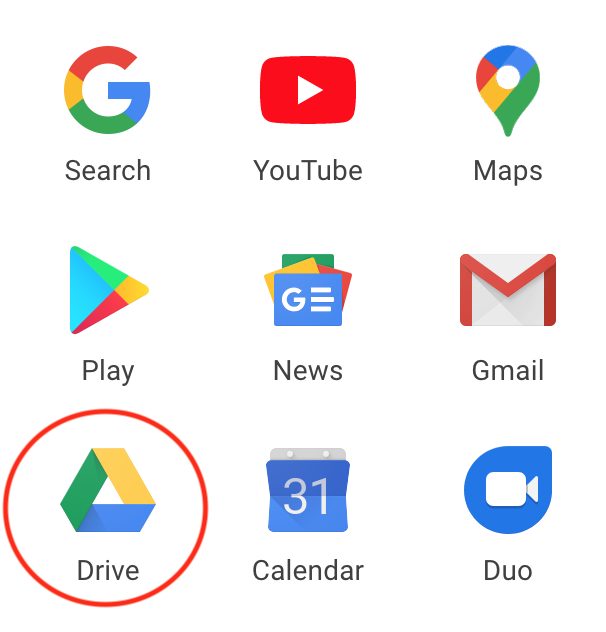
When you find Drive, click on it. A new tab will open and it will take you to your Google Drive account. This has the same log-in as your email and is your own online storage space. Think of it like a digital filing cabinet given to you by Google.
If you have purchased digital resources from Teachers Pay Teachers then it is likely that you already have some files in your Google Drive. You can also add or create files by clicking on the NEW button in the top left corner.
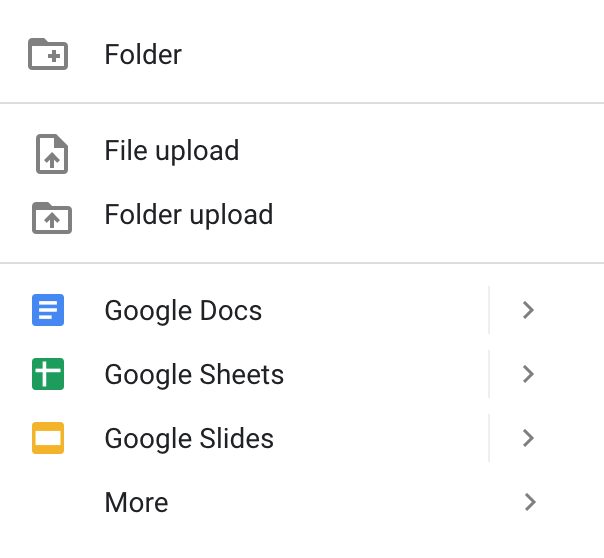
FOLDER will add a new folder to your Google Drive. You can put things inside the folder and its a great way to keep your files organized. Just like you’d create a folder on your laptop or desktop computer, you can do it here too.
FILE UPLOAD allows you to upload one single file to your Google Drive. FOLDER UPLOAD allows you to upload a folder and all the files inside of it to your Google Drive. If you have digital resources that you want to share with your students I would suggest first uploading them to your Google Drive.
The remaining options allow you to create new files using Google’s word processing (Google Docs), spreadsheet (Google Sheets) or slide show similar to Powerpoint (Google Slides) by clicking on those.
Once you have a file in your Google Drive it is really easy to share it with others. Towards the top of your Google Drive home page you will see these icons:

Just click on the file you want to share and then choose one of the icons above. The first icon (that kinda looks like a paperclip) allows you to get a link to share the file. The second icon (the person) allows you to share by adding people’s email addresses. The eye icon gives you a preview of the file and the trashcan deletes the file.
One thing to know is that the Google platform is a collaborative platform. That means that multiple people can edit the same file at the same time. You can avoid this with your students by either limiting their access to VIEW ONLY or sharing a copy of the file with them.
If the file I want my students to have is an assignment they will be completing online – then my first choice is to share a COPY as opposed to my original file. This is super easy to do. Simply get the sharing link for the file like this:

Click on Copy Link and then you can add it to an email, a web page or wherever else you have set-up to share information with your students. But you want to make one simple change. After you paste the link you want to delete the word EDIT
and add the word COPY in the exact same place. Don’t change anything else in the link – just those four letters.

Now, when a student clicks on this link a copy of the file will be saved for them. Each student will get his or her own copy so they can complete the assignment. But, if you forget this step, they will all be trying to complete the same file and that will be a nightmare – unless of course collaborative work was what you had planned.
To turn in an assignment students will have to either email you the file or send you the link of their completed work.
How to Assign Digital Lessons Using Google Classroom
Google Classroom is another free resource you have with your gmail account. While this option takes a little more set-up at the beginning it is the easiest way to send and collect assignments overall.
You can find Google Classroom in the same way your found Google Drive. Start with that square of 9 dots and scroll down until you see CLASSROOM.
Click on Classroom and you will be taken to your very own Google Classroom account.
When you first get to your Google Classroom dashboard it will look like this. But don’t worry we will quickly and easily get your first class set-up!

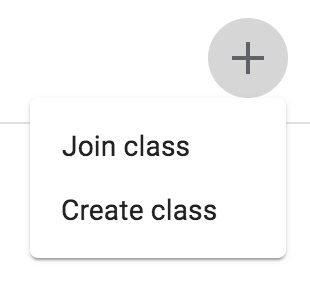
Do you see that plus sign ( + ) in the top right corner? Click on that and choose CREATE CLASS to set up your first online classroom.
Next you will simply fill in the requested information and give your class a name. You can add as much or as little information as you want here. There section, subject and room number are not required – but if you have multiple sections then definitely use them to keep yourself organized.

Here’s my first class! Right above the picture are four different tabs that will be how you navigate around. STREAM is your home page and as you do things will provide a running list of what is happening inside your classroom. CLASSWORK is where you will make assignments. PEOPLE is where you will add and find your students. GRADES is where you will find grades for each student.
Next you will want to add students to your class. You can either manually add each student to your class or you can send them a link to join the class.
Go to the PEOPLE tab to add your students.

You can click on the person symbol to send an email invitation for each student. Or you can send them a link to google classroom and have them join the class using the code for your classroom. You can find the code on your home page and under the people tab.
Once your students are in your class you are ready to create an assignment. You will do this under the CLASSWORK tab.
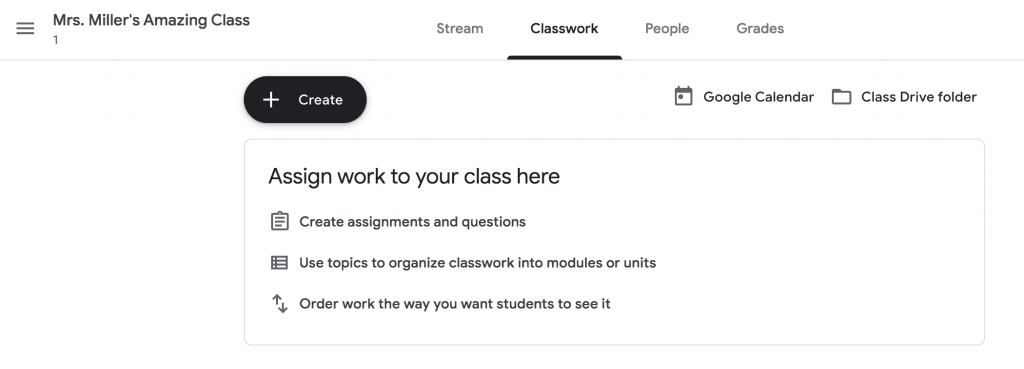
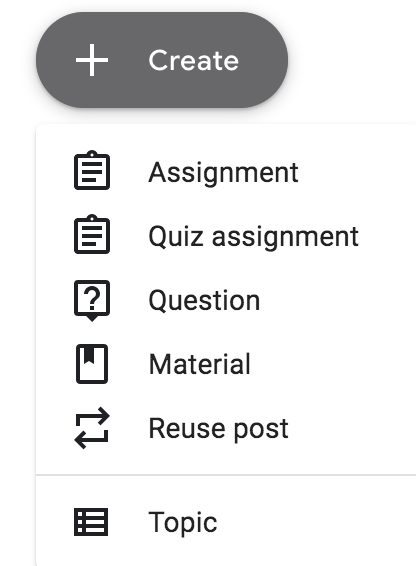
Click on the black CREATE button to begin. Choose the type of assignment you want from the drop-down menu. If you are just providing a reading – you will likely want to use Material. However, if there is work the students will do, then choose the Assignment option.
Next, you will fill in the requested information about the assignment. Remember that the more explicit you are in your instructions the less likely you are to get questions from the students or parents.
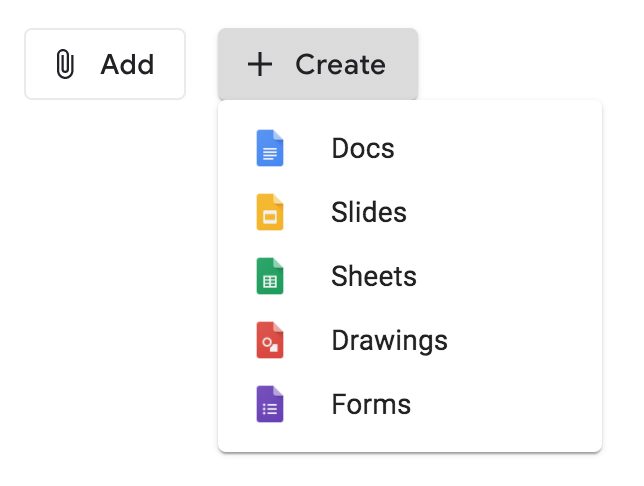
After you type the instructions you will want to click on ADD or CREATE. You will use ADD for a resource that is already created. You will use CREATE for a resource that you want to create yourself.
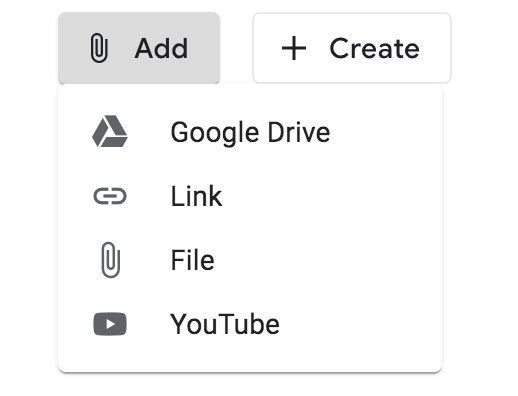
Remember those great lessons and resources we added to Google Drive. Well, this is where we are going to connect them in Google Classroom. Simple Click on ADD then GOOGLE DRIVE. You will see your Google Drive folder open and you can click on the assignment you want to give your students. Yep – its that easy! You can also add a file saved on your computer, a link to a webpage or a link to a You Tube video.
If the assignment file has not yet been made then you will want to do that using one of the options on the CREATE tab. This will allow you to create your own word processing file, spreadsheet or slide show for your assignment.
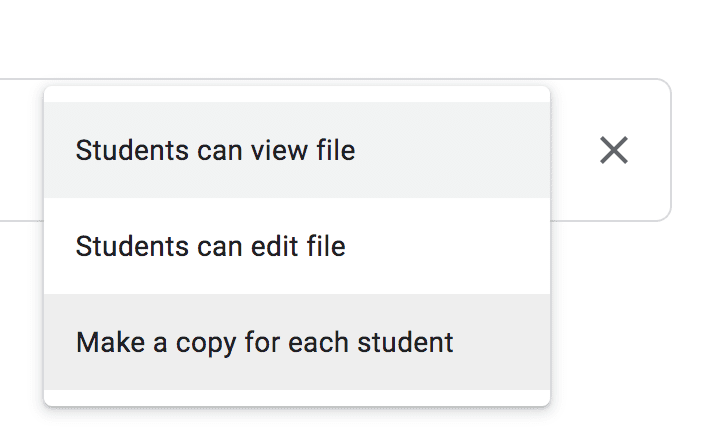
Once you add it you will see it listed on your Assignment that you are creating. At the end of the line you can choose whether students can edit, view or need their own copy of the resource. If they will be doing any work then choose the copy option. If they only need to read, then chose view. I honestly would not send just the edit option for an assignment because it will allow all students to edit the same file.
Once you’ve added all the information you need then click ASSIGN and all of the students in your class will automatically be notified of the assignment.
Here’s what makes it the most efficient option of all. When students complete their assignment they can turn it in to you using Google Classroom. This means no bogged down email and one place to check for all assignments that are turned in.
Wrap-Up
I hope now that you have a few different options for connecting with your students during distance learning. Any of the options listed above will work and allow you to keep your students learning while they are away from the classroom.
Looking for ideas for digital lessons? Check out this blog post I did with some of my favorites!
Save this for later!
I know there is a lot of information here and a lot of steps too. Don’t worry about forgetting something. You can always pin this to your favorite classroom Pinterest board so you can get back here easily.